Getting started
This article will guide you through deploying an application to quickly become familiar with the basic functionality of Rainbond.
Prepare
Install Rainbond,Ref quick install
Prepare the source code of the sample application, Here we take a Maven project as an example, Git: Maven example
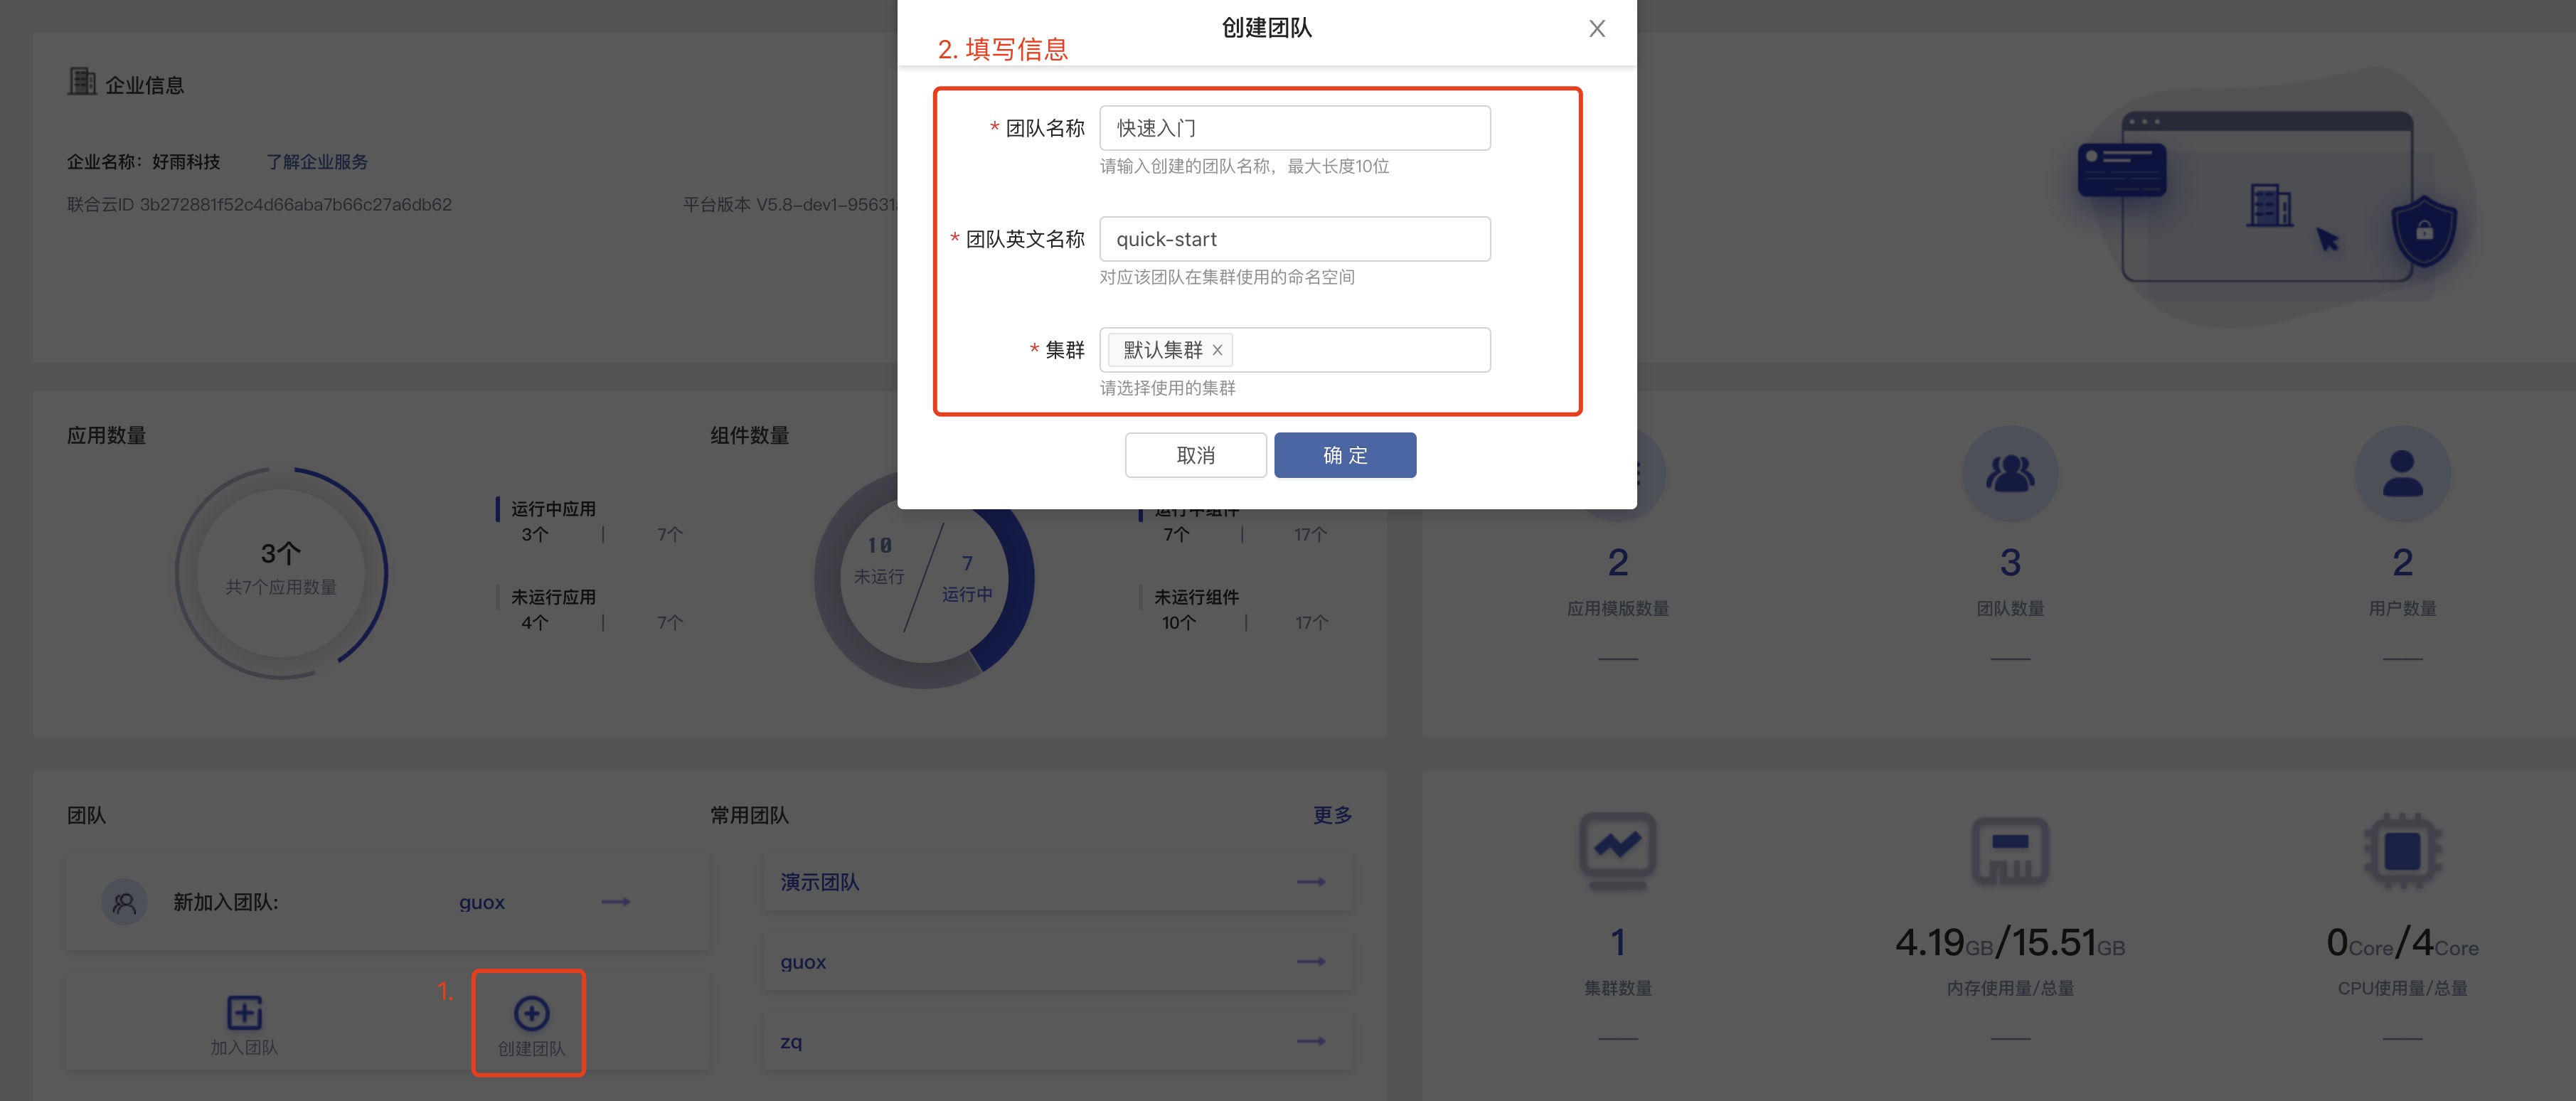
Step 1 Create a team
Concept
In Rainbond, the team is the basis for managing all resources, and all resources belong to the team, including clusters, applications, components, etc. Therefore, we need to create a team before we can manage our resources and deploy applications to the cluster.
- Team Name: Mainly used for page display, it is convenient for users to distinguish different teams
- Team English name: is the name of the automatically created namespace in the cluster
- Cluster: Select the cluster managed by this team, one team can manage applications under multiple clusters
After entering the Rainbond console home page, we can see the button to create a team in the lower left corner of the page. After clicking, you need to enter the team name, the English name of the team, and the cluster managed by the team.
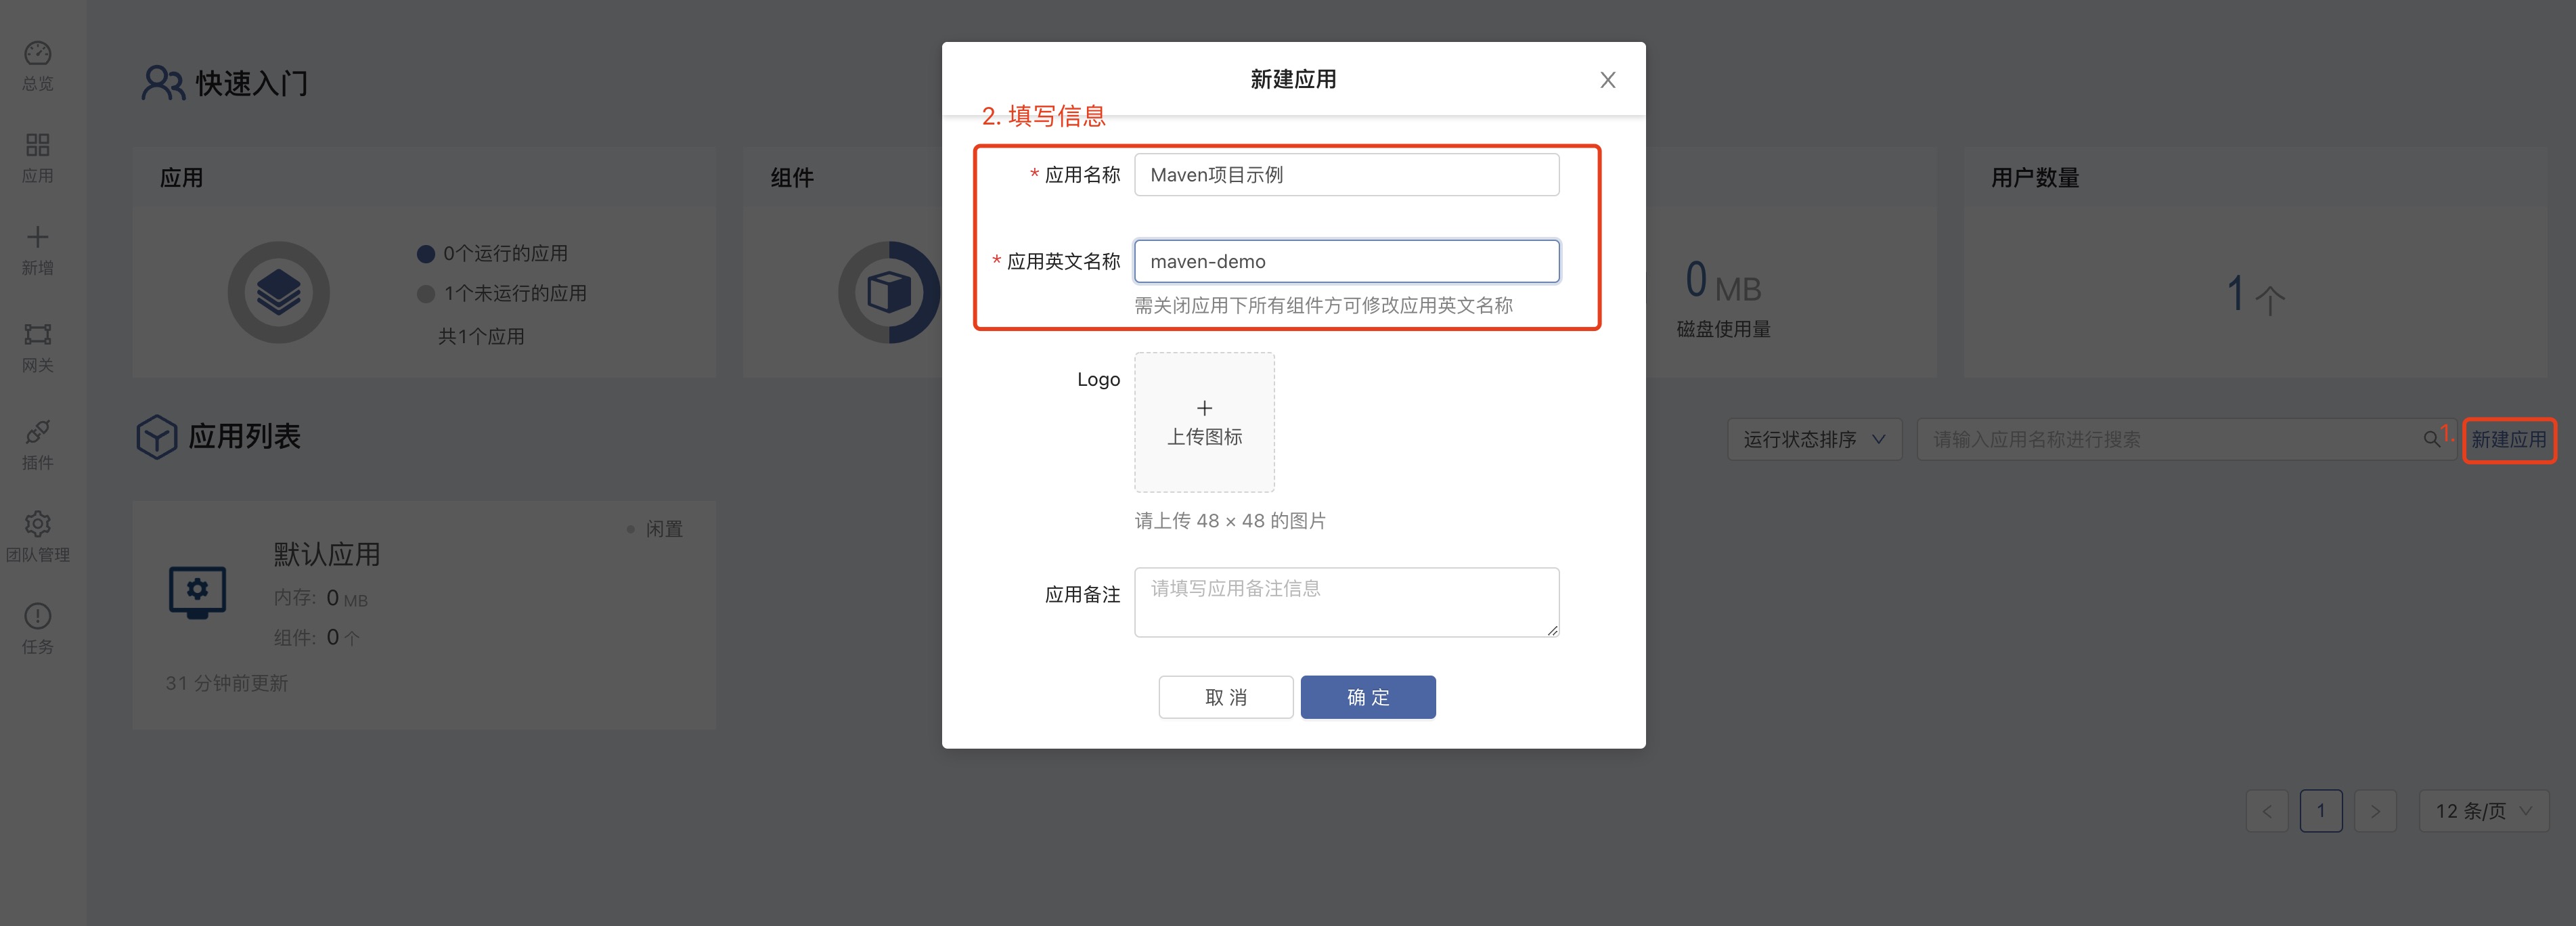
Step 2 Create the application
Concept
Usually, an application should be a collection of all modules of a business system.
- Application name: Mainly used for page display, users can define it as the name of the business system, here I filled in
Maven project example - Application English name: The module deployed under this application, the generated resources will start with this name
When the team is created, an application will be generated by default. We can regard the business system composed of Maven project and Mysql database as an application.
Here we do not use the default application, to create a new application Maven project example. As shown below:
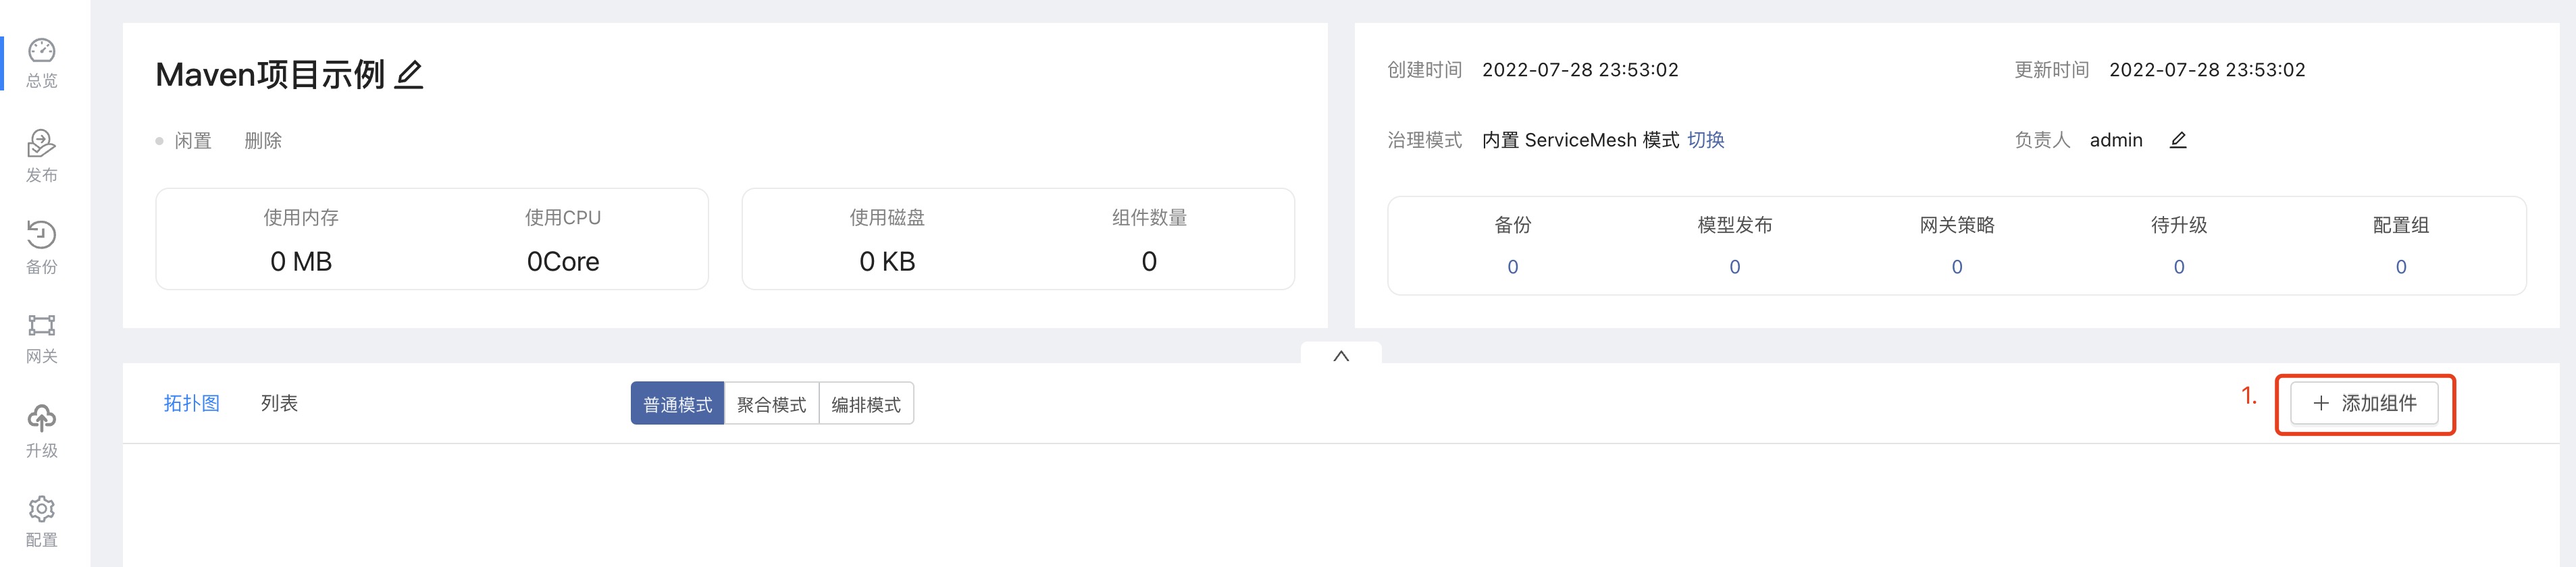
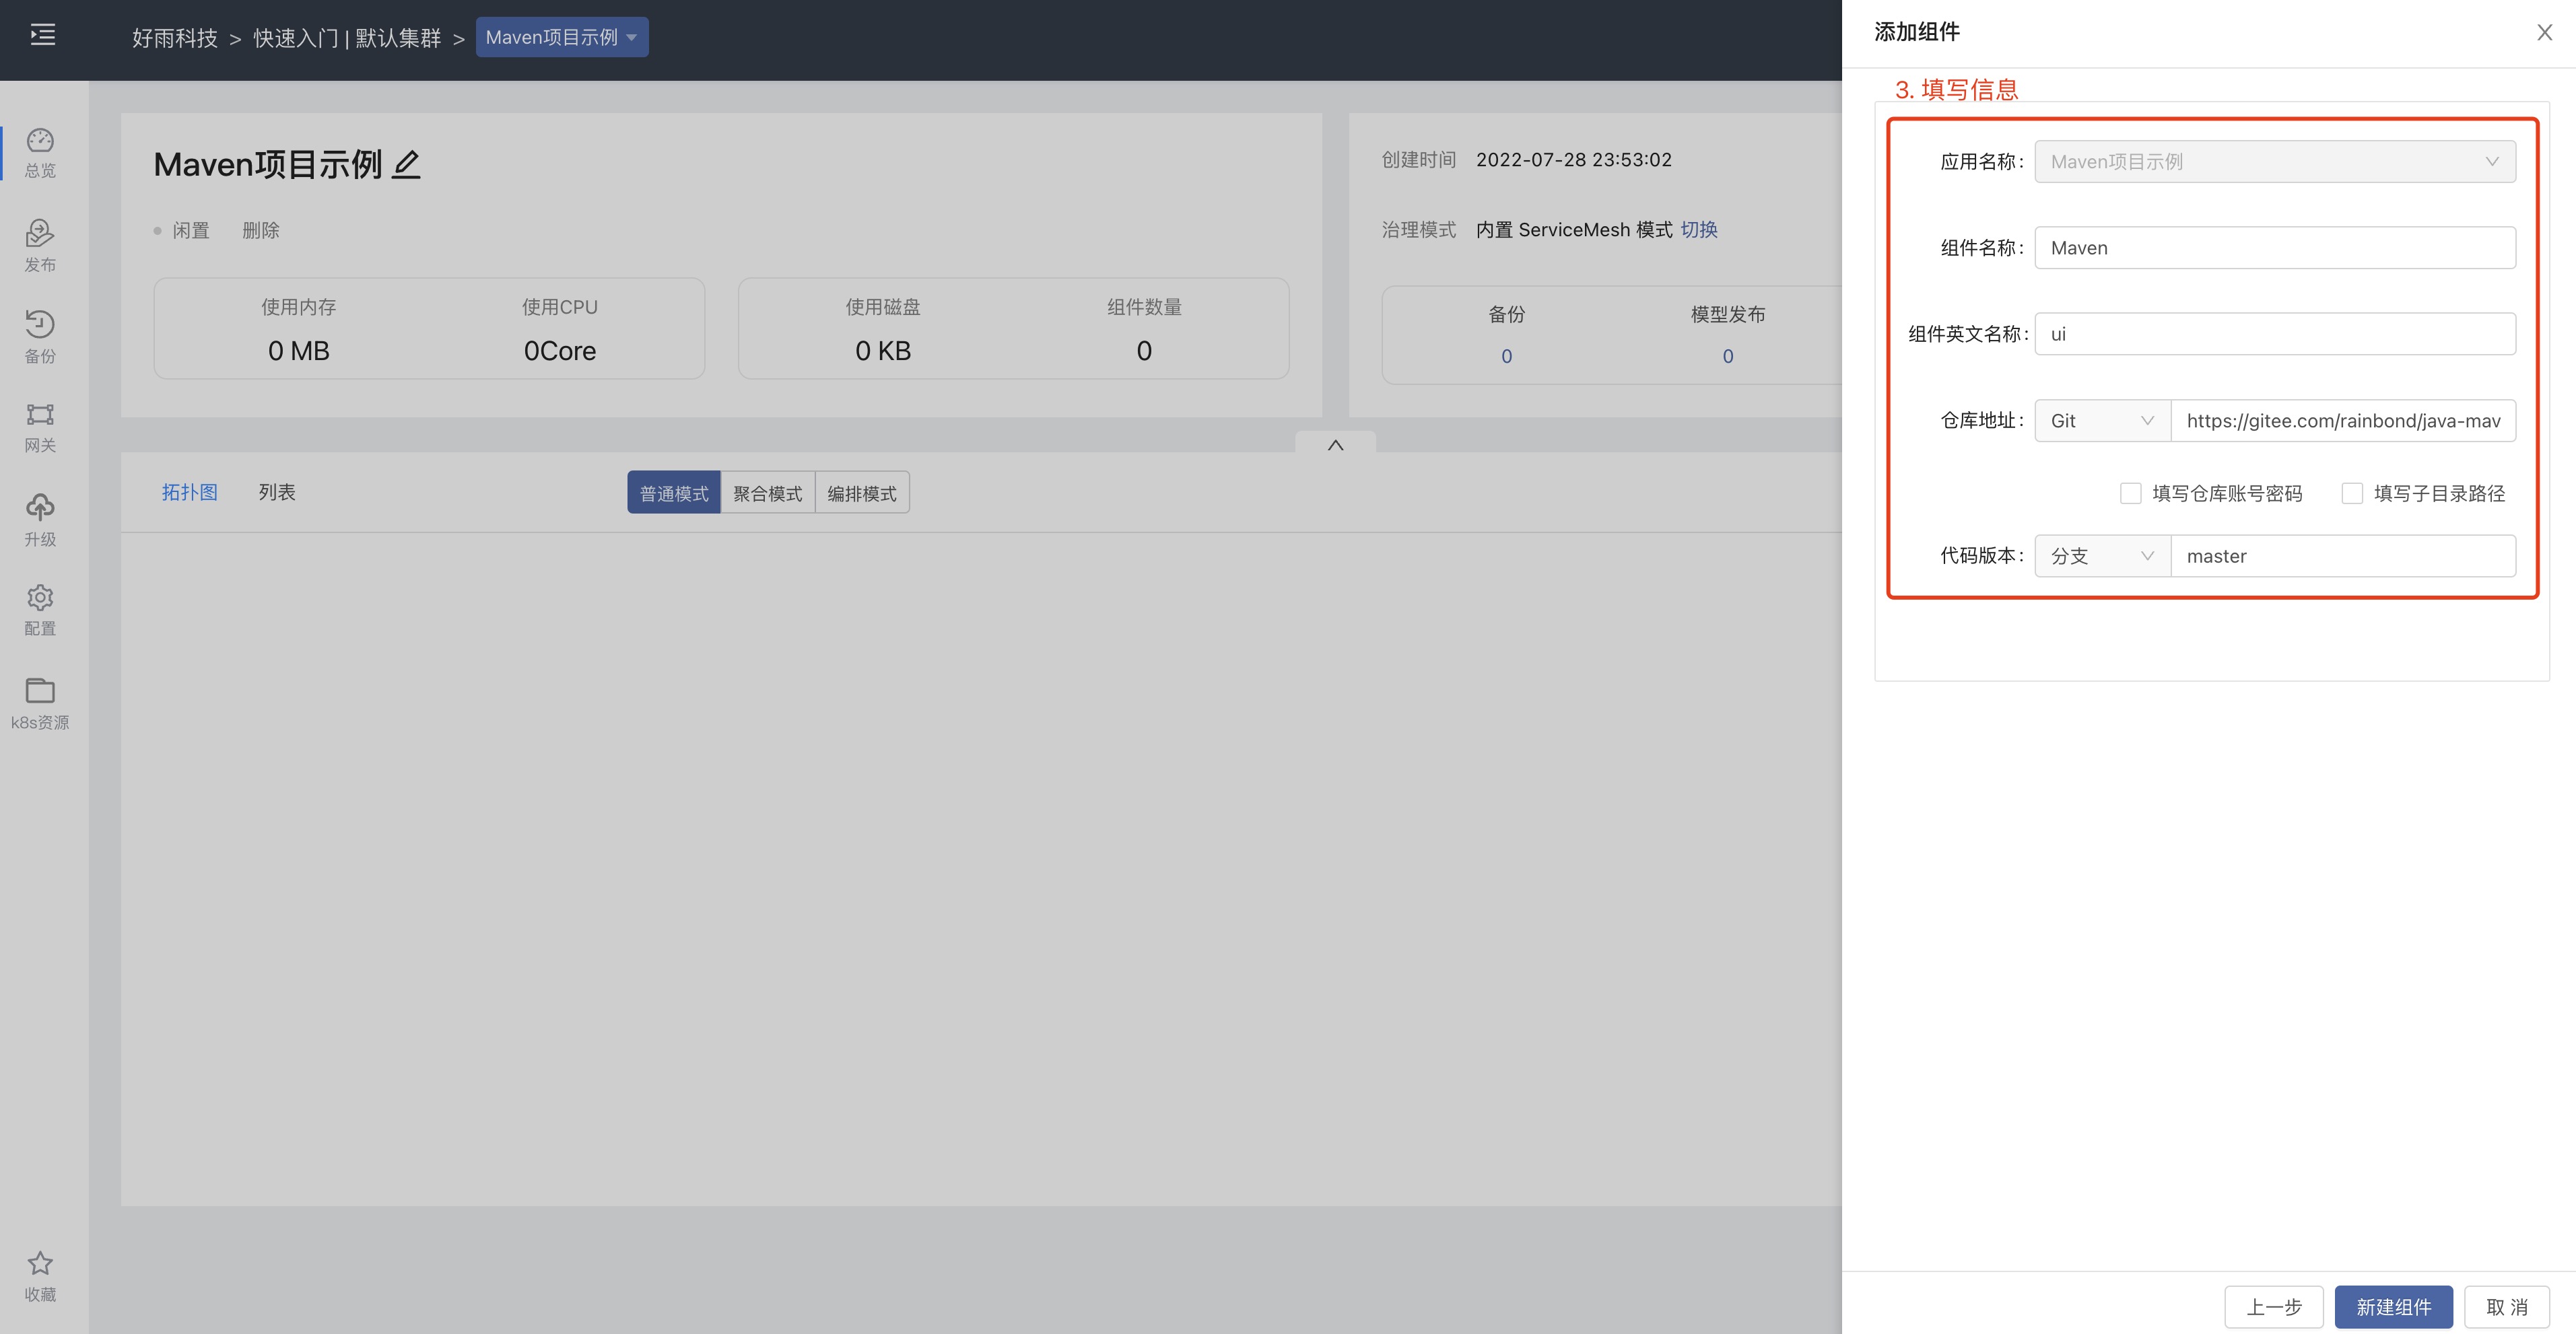
Setp 3 Create the component
Concept
Components are the basic units that make up an application. Each microservice in an application can be described as a component. In the Maven project + Mysql business system we are about to deploy, the Maven project and Mysql database are described as a component respectively
- Component name: mainly used for page display, users can define it as the name of the module
- Component English name: The final resource name generated by the component in the cluster will be
Application English name --> Component English name - Code version: defines the branch where the code is located
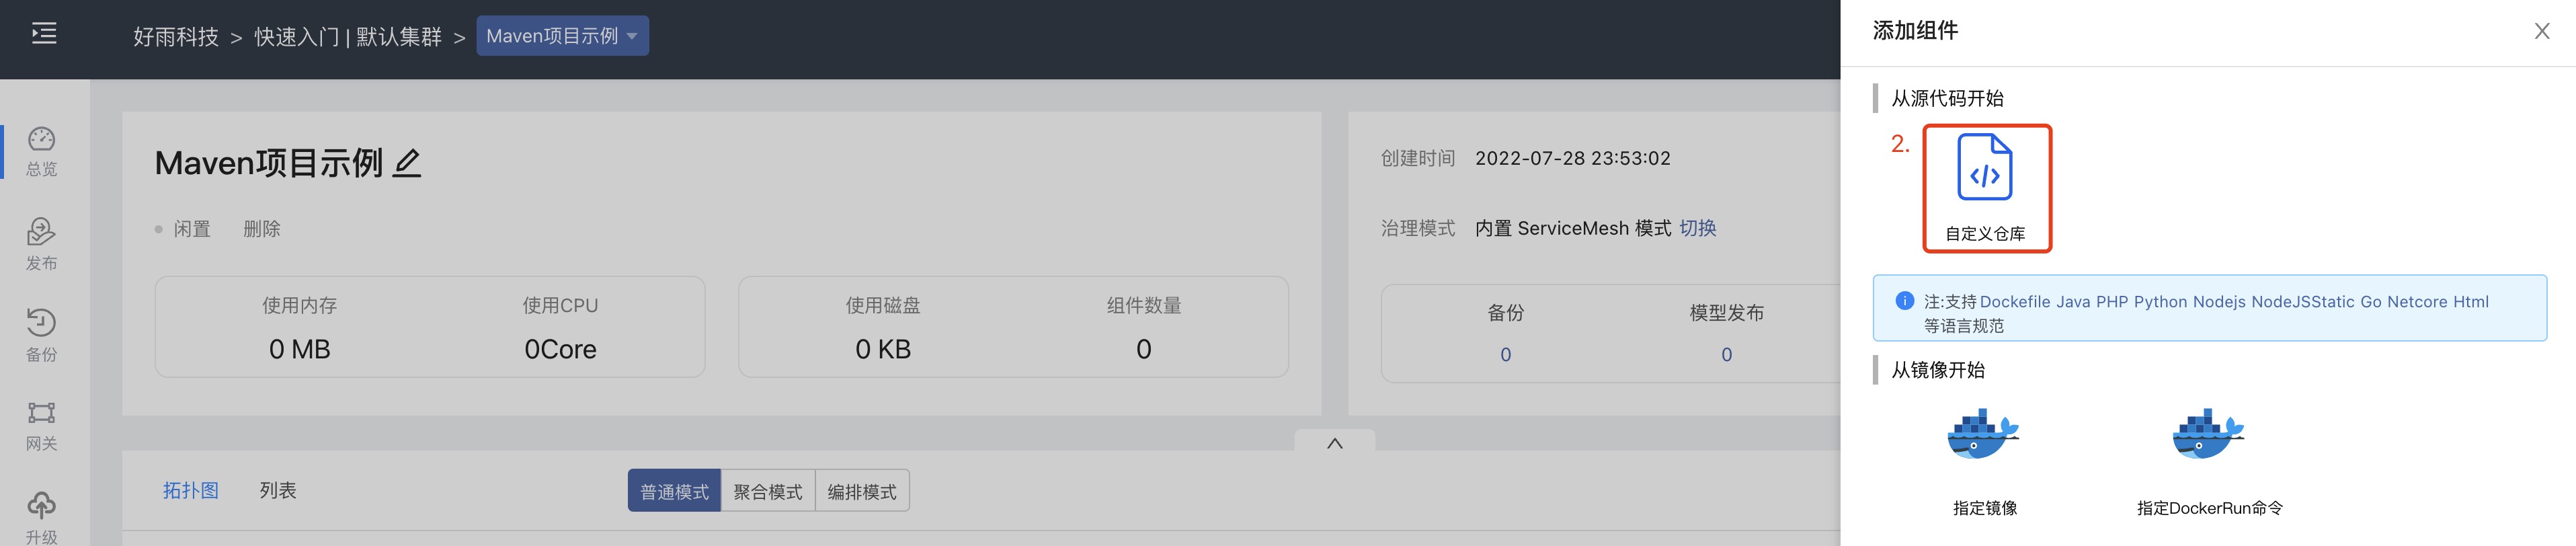
We click on the newly created application Maven project example, and select `Add component --> Custom warehouse --> Fill in information --> New component' on the right. The configuration information is shown in the following figure:
After clicking Create a new component, the code language and source code information will be detected. After the check is passed, click Create to create the component.
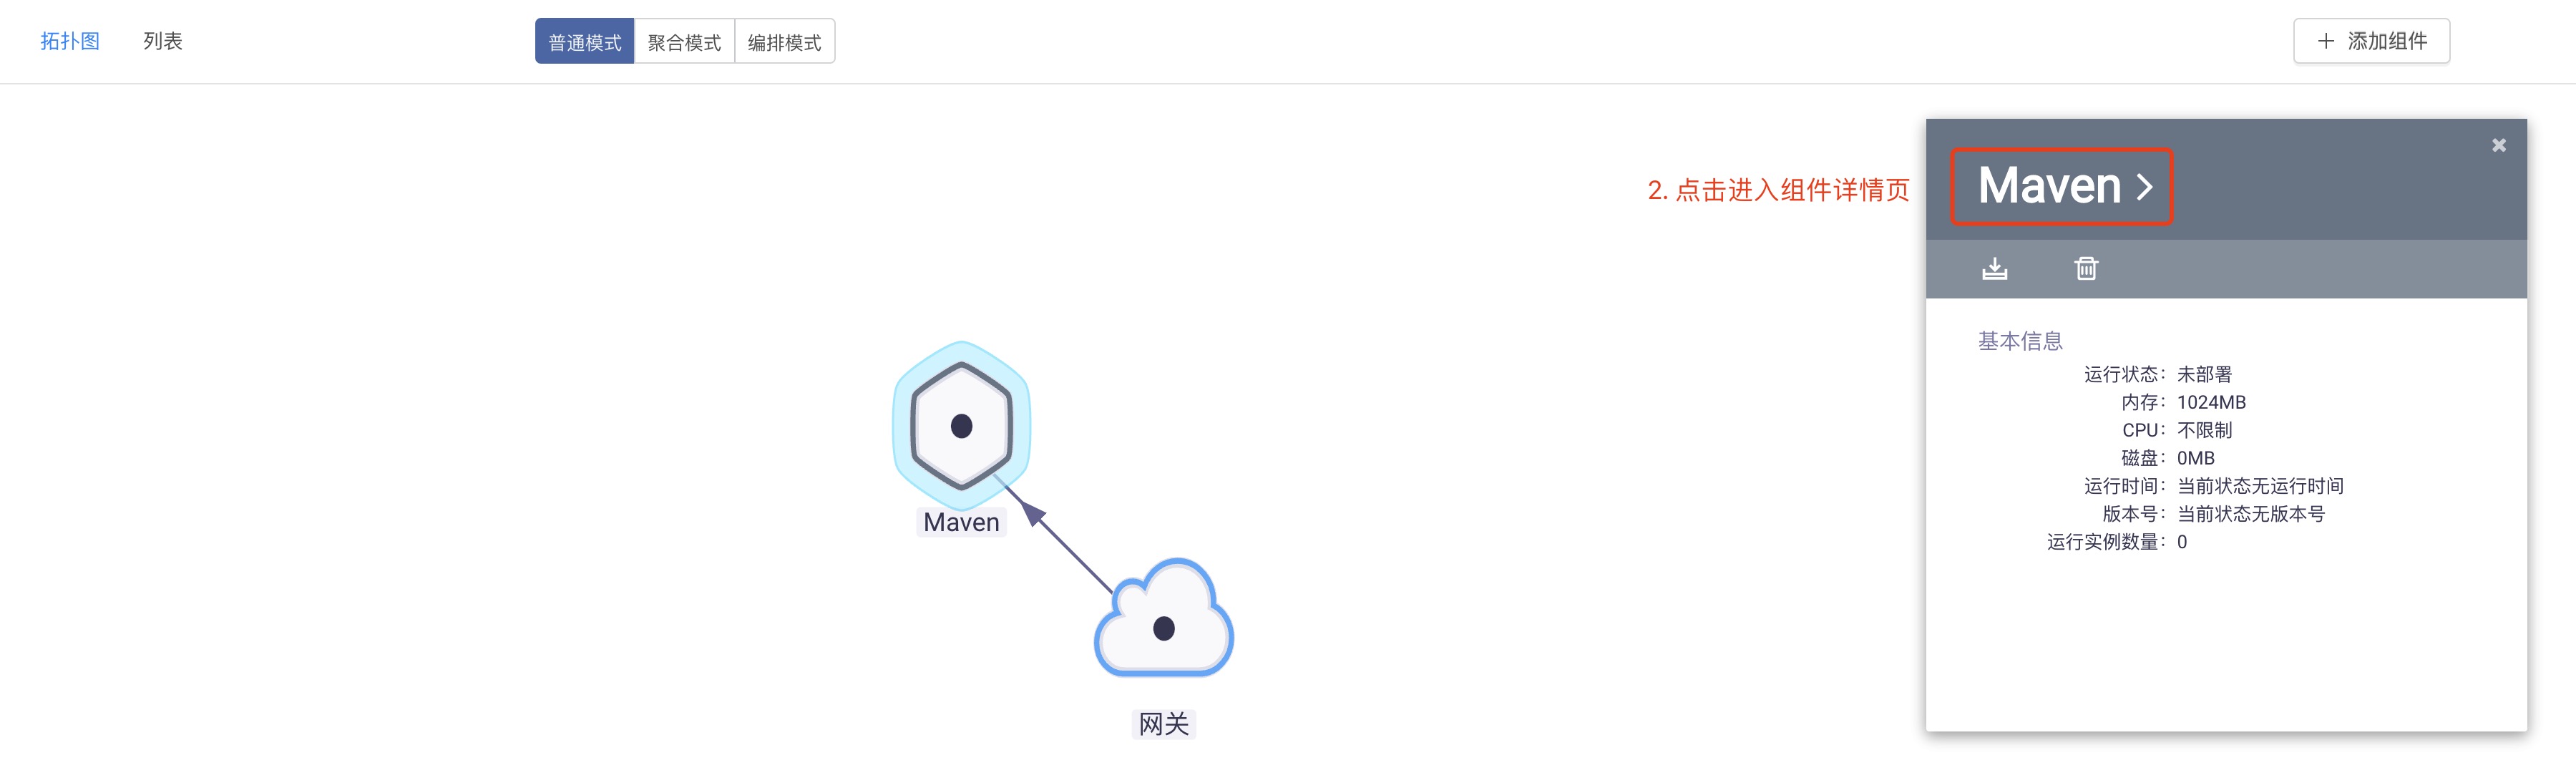
At this point, we can see the component in the topology diagram, click the component to enter. You can see that the component is under construction. After the component is built, you can access the component.

info
When Rainbond is installed, a domain name with the suffix of grapps.cn will be automatically generated, and the components deployed in the platform can be accessed through this domain name. The detailed access address can be viewed and modified in the Port column.
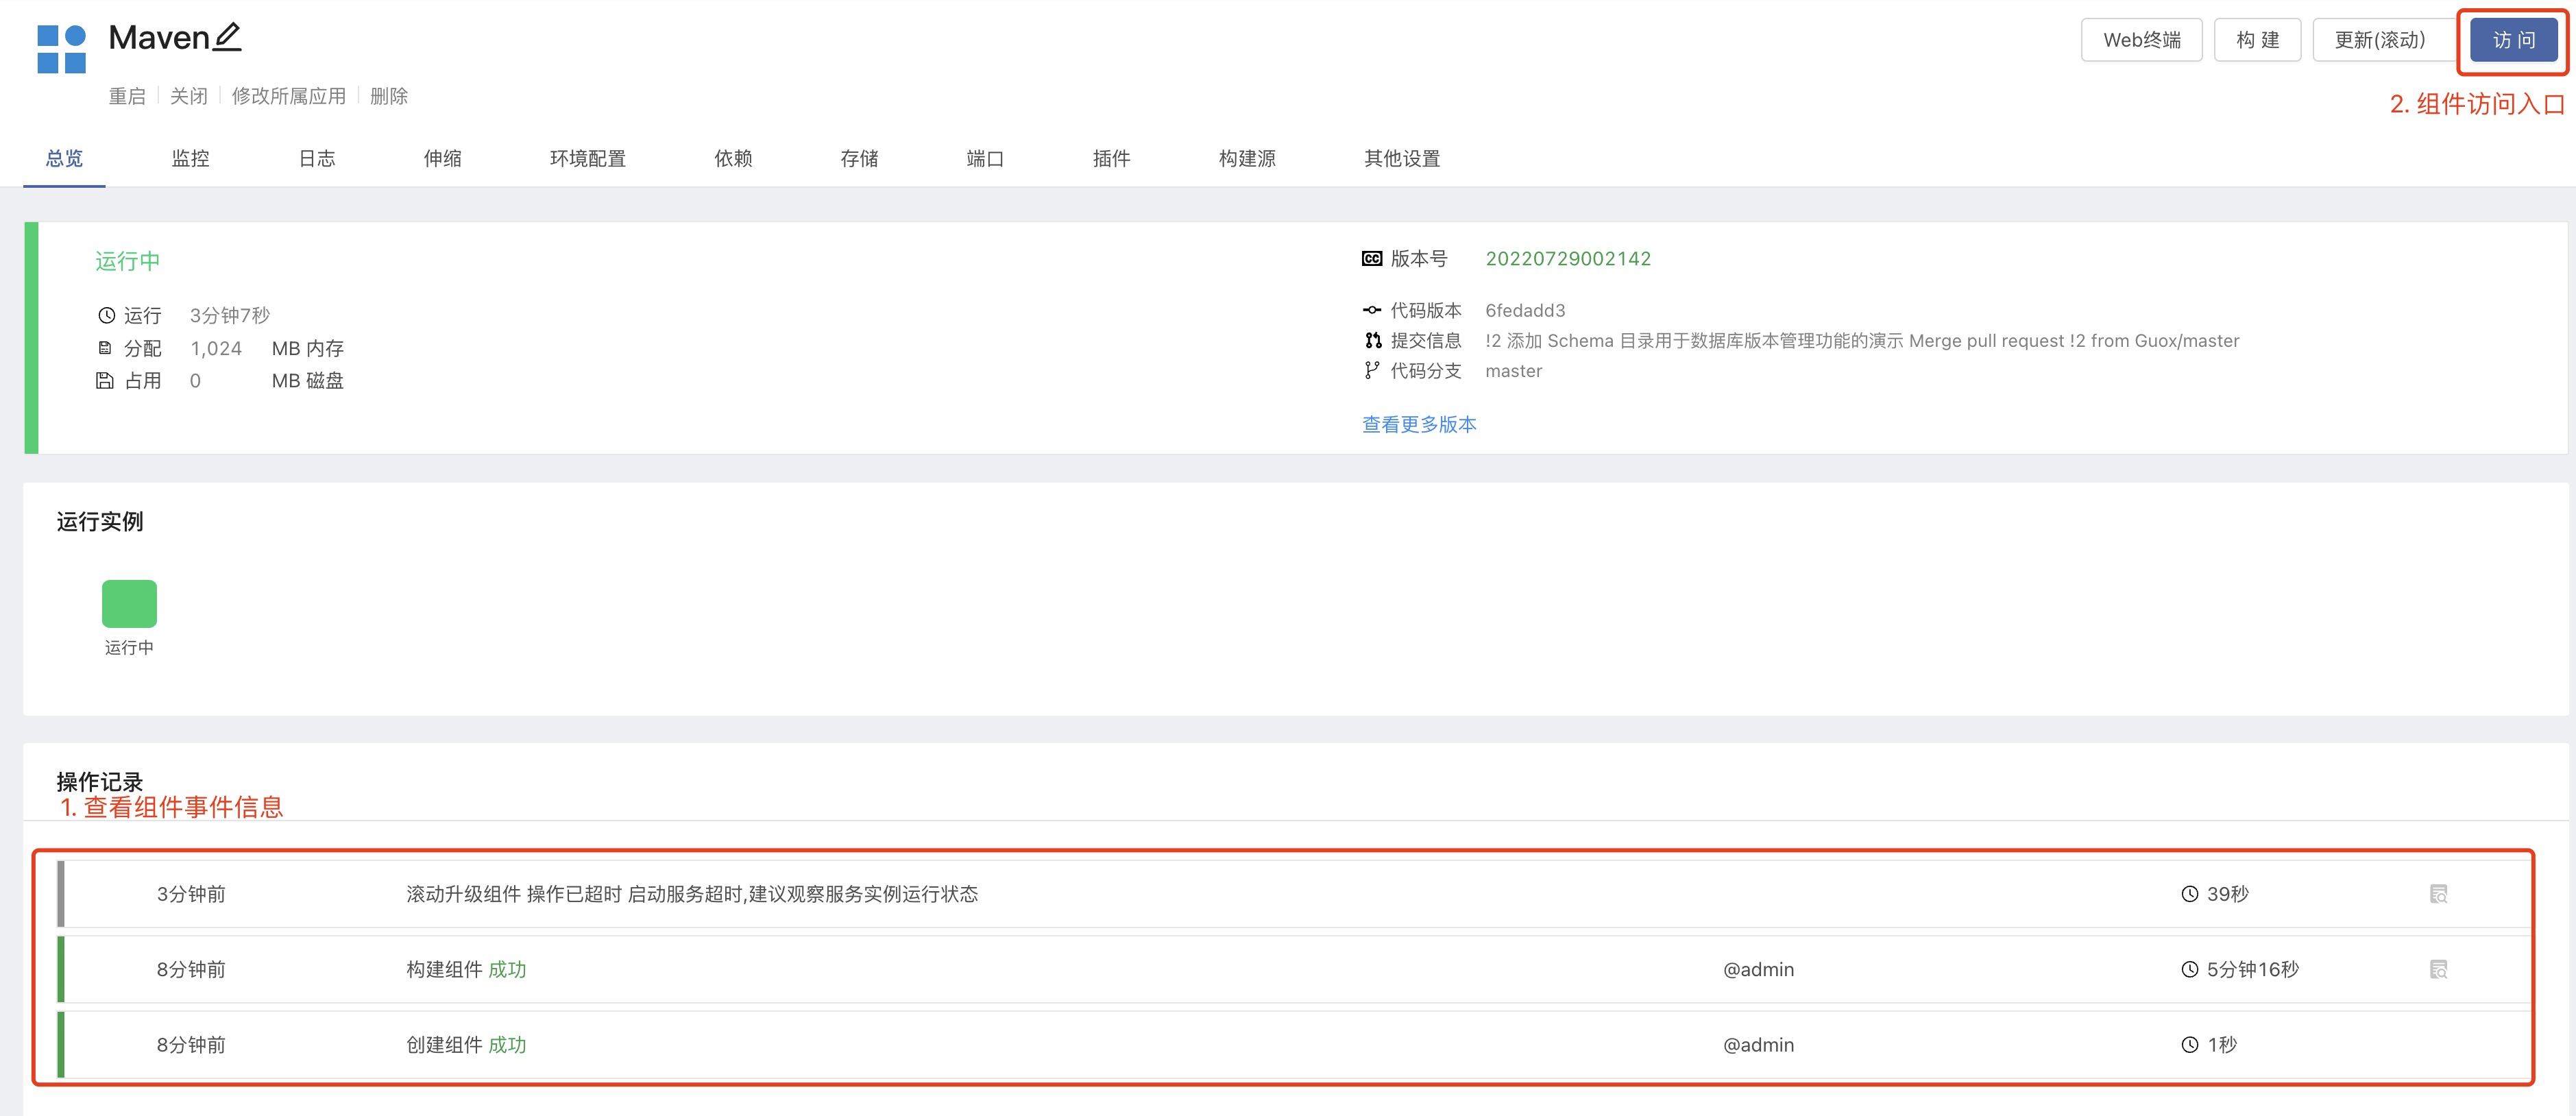
Setp 4 Access the component
When we see that the component running status is green, it means that the component is running normally. At this time, we can click the access button in the upper right corner to access the component, as shown in the following figure::
At this point, we have deployed our first component on Rainbond.
Step 5 Orchestrate the application (optional)
In the previous steps, we just deployed a module under the Maven project example application, that is, the UI part. Next, we will briefly introduce how to deploy a Mysql database and make the Maven project read the MYSQL database. information.
We still repeat the previous steps of creating a new component. Under the application Maven project example, select Add component-->Start from the application market-->Open source application store-->Search Mysql-->Install MYSQL-Percona stand-alone version . If you do not have installation permission, please click Deauthorize under the search box to obtain permission.
After the installation is complete, we can see that there is an additional Mysql component under the application. We choose the orchestration mode to connect Maven with Mysql. This establishes the dependency between the Maven project and Mysql. After adding dependencies, follow the prompts to update the components.

After waiting for the component update to complete, we can access the Maven component again, click on the Mysql example, and see the Mysql connection information and the tables that exist in the database. As shown below.
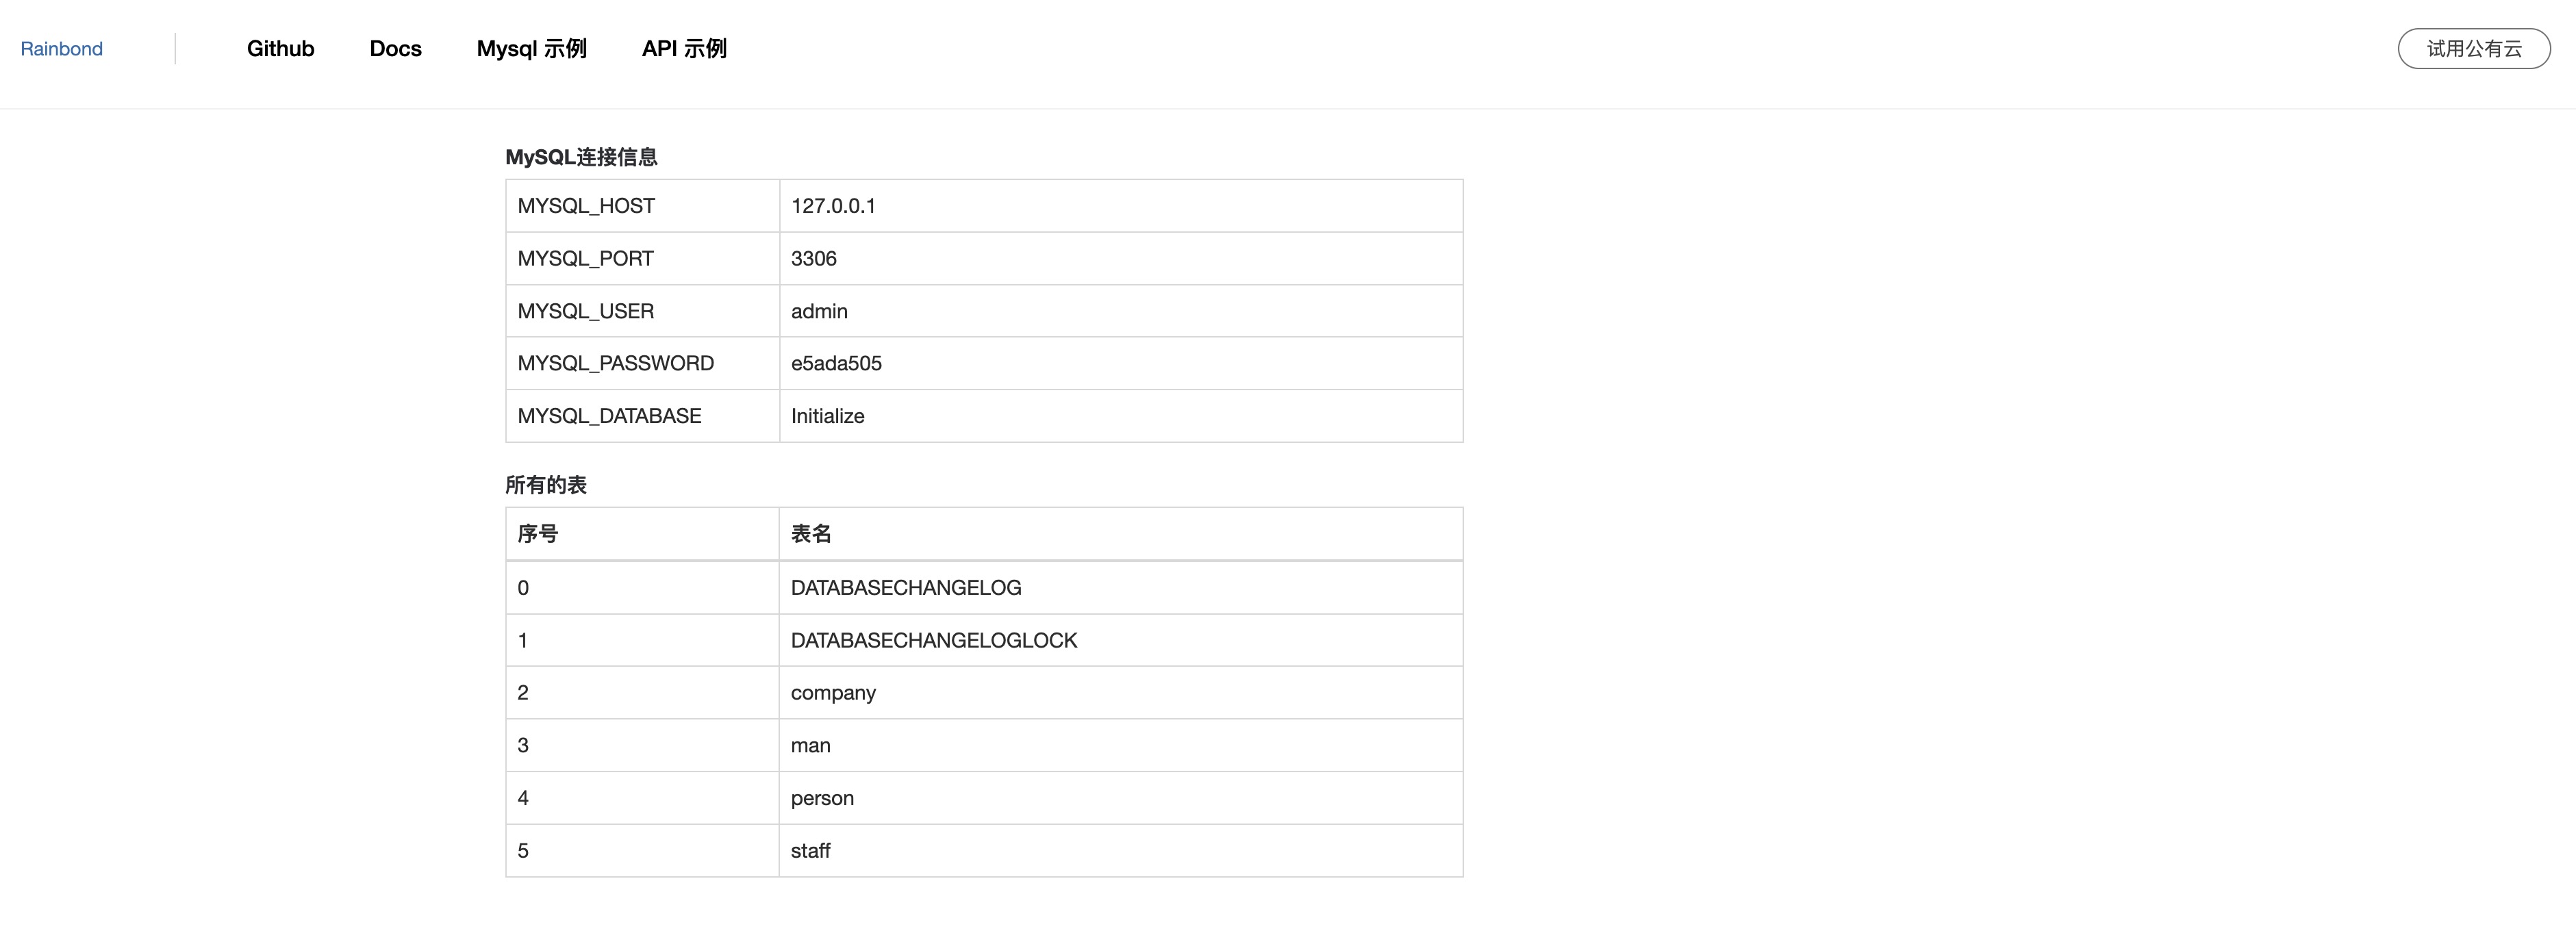
This shows that our project has been successfully connected to the Mysql component we just deployed, and the corresponding table information has been read. At this point, our application Maven project example is completely deployed. It contains a Maven project and database. You can clearly see the dependencies between them in the topology diagram. If you have questions about the communication between Maven components and Mysql components, you can refer to Inter-Service Communication.
Next step
Next, you can refer to the User Manual for more functions and gameplay.